
Commercial Sound and Video Systems

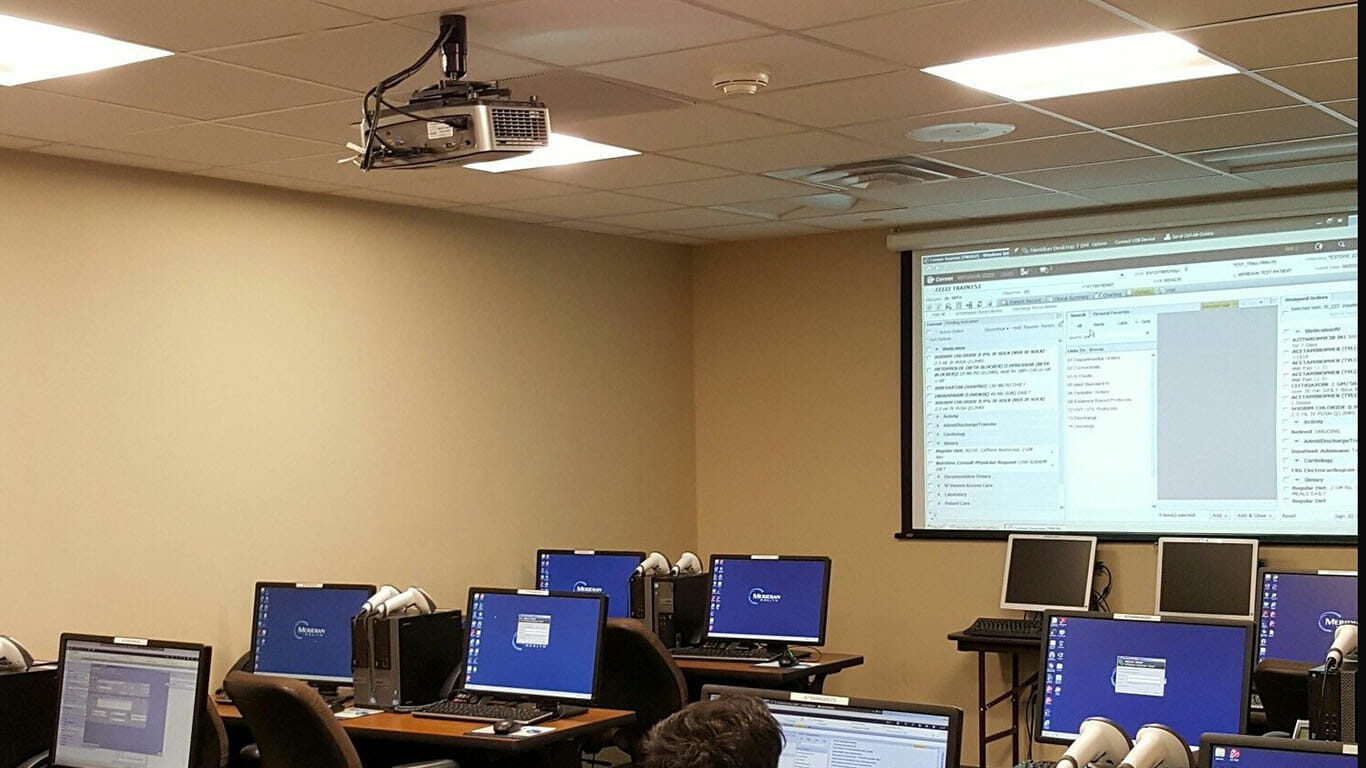
One of the most common pieces of technology used in the professional AV industry today is the video projector. These units can be critical components of boardrooms, classrooms, training facilities, meeting rooms, auditoriums and even in Churches & Temples. Today projectors are feature rich and very diverse and choosing the right unit for your specific application can be difficult.
With so many options on the market, it’s easy to feel overwhelmed by the array of projectors, all seemingly promising cinematic magic or rock-solid business performance. But to choose the right fit, it’s helpful to break them down into four main categories: home theater, business, portable, and ultra-short-throw. Let’s cut through the confusion and explore what sets each apart.
Home Theater Projectors:
If you dream of transforming your living room into a cinema, this is your best bet. Home theater projectors focus on rich color reproduction, high contrast, and deep blacks, which are ideal for movies and gaming in a darkened environment. While some high-end options now offer 4K resolution for astonishing detail, keep in mind they shine (literally and figuratively) in spaces where you can control the lighting. In brighter spaces, you’ll want to look for models with higher brightness levels and consider pairing them with a quality projection screen to minimize washout.
Business Projectors:
When the priority is clear communication (think charts, slides, and video calls) a business projector is designed for the task. These units typically crank up the brightness, allowing presentations to remain crisp and legible even in well-lit boardrooms or classrooms. They’re optimized for displaying text and graphics, although they can still handle videos or occasional entertainment when duty calls.
Portable Projectors:
For those constantly on the move, portability matters. These projectors are lightweight (often tipping the scales at less than 6 pounds), compact, and quick to set up. Despite their small form factor, many offer surprisingly long lamp life and enough power to handle presentations or spur-of-the-moment movie nights, whether you’re at an off-site meeting or camping under the stars. Just remember, they may make some sacrifices in image size and brightness compared to their larger counterparts.
Ultra-Short-Throw Projectors:
Tight on space or unable to mount a ceiling projector? Ultra-short-throw projectors are your go-to. Placed just inches from the wall or screen, they’re masters at delivering large images in small rooms, making them a clever solution for apartments, classrooms, or meeting spaces where traditional setups won’t work. No need to worry about shadows from passersby or complicated installation.
Each of these categories brings its own strengths, so as you navigate your options, keep your specific environment and needs front and center.
To simplify this process here are three basic (but important) specifications to look for:
Brightness:
Projectors today are becoming ever brighter and sharper. Where an ultra-bright projector a few years ago was 2000 lumens, most units today (for corporate environments) can be 4000 to 6000 lumens. Brightness is important but can be costly, and it is also not the only specification you should be concerned with. If the room is bright and very well lit 5000 to 6000 lumens should be considered. In the average meeting space application with controlled lighting (no direct sunlight on the screen) 4000 to 5000 lumens should be sufficient.
When evaluating brightness, keep in mind that projectors actually have two separate measurements:
It’s important to compare both numbers. If a projector has high white brightness but lower color brightness, your images may end up looking dull or lacking in detail, especially with vibrant content.
For business environments, prioritize higher lumen ratings in both white and color brightness to ensure presentations stay crisp and clear, even in well-lit rooms. For home theater setups, brighter is not always better. You want just enough brightness to provide rich color contrast without washing out those all-important dark-scene details.
Resolution:
The newest trends are towards HDMI interface with DVD players, Laptops and Teleconferencing devices. HDMI may very well replace the old VGA standard in the years ahead (perhaps sooner rather than later). But HDMI inputs on a projector do not mean that the unit can provide the full resolution quality that one may expect.
Especially since most people are watching TVs at home that has a True HD (1920 X 1080) resolution. If the image is important to your presentations look for a minimum of a WXGA (1280 X 720) projector. Of course, a better choice would be SXGA (1280X1024) or the goal for HD at WUXGA (1920X1080) would be even better. Keep in mind this resolution rating will have a substantial impact on the cost of the unit, but will also affect the quality of the presentation.
It’s worth understanding the basics behind resolution. A projector’s native resolution is simply the total number of pixels it can display. The more pixels packed into the image, the crisper and more detailed your visuals will appear. High resolution also allows you to sit closer to the screen without noticing any pixelation, which is a big plus for those immersive movie nights or detailed presentations.
Projector resolutions range from 480p on the low end, through increasingly common formats like 720p (HD), 1080p (Full HD), and up to 4K or even 8K for those seeking incredibly lifelike picture quality. For best results, try to match your projector’s resolution to the main video source you’ll use. For example, if you’re connecting a laptop with a 1024 x 768 display, an XGA projector will give you a perfect match. If you want to enjoy movies from a 4K Blu-ray player, only a 4K projector will deliver the full experience.
In short, while HDMI inputs offer modern connectivity, it’s the projector’s actual resolution that determines how sharp and vivid your images will look. Consider both your sources and your desired image quality before making the leap. Your eyes (and your audience) will thank you.
Screen Size and Aspect Ratio: Finding the Right Fit
Selecting the appropriate screen size and aspect ratio for your projector setup is every bit as important as choosing the right projector itself. The key is to ensure your screen complements the projector’s native aspect ratio (commonly 4:3, 16:9, or 16:10) so that your images appear crisp and correctly proportioned. Matching the aspect ratios avoids those annoying black bars or images that seem stretched or cropped.
When determining the actual size of the screen, consider the dimensions of your space and the viewing distance. Screens can range from a modest 50 inches up to a cinema-style 300 inches measured diagonally, but bigger isn’t always better. Start by measuring your room, especially ceiling height, and ensure the bottom of the screen will be positioned high enough above furniture or obstacles like tables so everyone gets a clear view.
Keep in mind:
A good rule of thumb for viewing distance is to sit at a distance 1.5 to 2.5 times the screen’s diagonal measurement, ensuring comfortable and immersive viewing. Taking a few extra minutes to plan out these details will make all the difference in your final setup.
Contrast Ratio:
A less well known yet still important spec for any video display device is Contrast Ratio. The higher this number (1000 or 3000 or greater) the better the image quality on your screen. Contrast ratio in its simplest form is the ratio of the light reflected from an all-white image and an all-black image. So a projector with a 3000:1 contrast ratio means that the white image is 3000 times brighter than the black image.
The higher the contrast ratio, the more detail you can see on the projected image whether its numbers, pictures, graphs, text, or video. Contrast is what makes it possible for us to see the subtle shades of colors. So good contrast is all about seeing the details.
Projector Light Sources: Lamp, Laser, and LED—What’s the Difference?
As you narrow down your projector options, one more key decision awaits: the type of light source powering your image. The three main contenders here are standard lamp, laser, and LED, each offering distinct advantages and trade-offs when it comes to performance, longevity, and upkeep.
Let’s break down what you can expect from each:
In summary, consider how (and how often) you’ll use your projector. Frequent users or anyone wanting hassle-free maintenance may lean towards laser or LED. If you’re balancing brightness and budget, lamp models are still strong contenders. Matching the light source to your environment and needs will help ensure your projector delivers years of reliable performance.
Understanding Projector Display Technologies
When evaluating projectors, the type of display technology used can make a significant difference in performance and overall image quality. While brightness, resolution, and contrast are foundational considerations, understanding display technologies like DLP, 3LCD, and LCoS will help you make a well-informed decision for your space and needs.
DLP (Digital Light Processing)
DLP projectors use tiny mirrors to reflect light and create the image you see on the screen. One of the main strengths of DLP is its ability to provide smooth video playback, which is particularly useful for fast-moving content like sports, video clips, or dynamic presentations. DLP models tend to be compact and lightweight, making them a popular pick for portable needs. Higher-end DLP units employ three separate chips to enhance color accuracy and richness, which you’ll often find in premium and large-venue projectors.
3LCD (Three-Panel Liquid Crystal Display)
3LCD projectors work by passing light through three separate LCD panels (one each for red, green, and blue) to generate a vibrant composite image. The result: strong color brightness and faithful reproduction of content. 3LCD devices are generally known for impressive color output and consistent image quality, with the added benefit of having no moving parts inside, which can mean quieter operation and potentially less maintenance.
LCoS (Liquid Crystal on Silicon)
LCoS technology combines aspects of LCD and DLP by reflecting light off liquid crystal chips backed with mirrors. This approach produces high-resolution, detailed images with notable contrast and deep black levels, making them ideal for applications where picture quality is paramount—think detailed data, photos, or high-end home theaters. LCoS is usually found in premium projectors; you’ll often see it marketed under names like D-ILA (JVC) or SXRD (Sony), though the underlying technology remains the same.
In summary, choosing among these technologies largely depends on your use case:
Throw Ratio: Getting the Image to Fit
Another important, though often overlooked, specification is the throw ratio. The throw ratio determines how large your image will be, based on how far the projector is from your screen. Put simply, it’s the relationship between the distance from the projector lens to the screen (the “throw distance”) and the width of the projected image.
For example, if your projector has a throw ratio of 1.8:1, it means that for every 1.8 feet of distance between the projector and the screen, you’ll get 1 foot of image width. So, let’s say you have limited space and can only put your projector 9 feet back: with a 1.8:1 throw ratio, your image will be 5 feet wide (divide the throw distance by the throw ratio).
Why does this matter? If you’re planning to ceiling-mount your projector or have a smaller room, knowing the throw ratio is critical. If space is tight, you might need a “short-throw” projector, which is designed for close-up installation but can still produce a large and vibrant image across your screen, which can be great for classrooms, boardrooms, or any area where moving walls isn’t an option.
To figure out what throw ratio you need:
Many manufacturers, including Epson and BenQ, provide detailed throw ratio specs for each model, so always check before purchasing. If in doubt, there are also plenty of online tools and calculators available to help you crunch the numbers.
There are many other specifications and features that can be of value to review, but these three will give you a solid foundation for making the right choice to achieve the desired end-result. Who isn’t looking for the “biggest and brightest” but often budget will dictate what we will finally purchase. Of course, the most critical decision you can make will be choosing the right A/V vendor to install, replace or otherwise handle your sound and/or video needs. Relying on a trusted resource provider in A/V, such as CSAV Systems, can save you and your company a lot of money, time and most importantly embarrassment.
Projectors have certainly come a long way, and if you thought the story ended at brightness, resolution, and contrast ratio, think again. Today’s models offer an incredible array of additional features that can make your setup more flexible, powerful, and downright convenient.
Wireless Connectivity and Streaming
No more scrambling for a tangled mess of cables. Many modern projectors now support wireless connectivity, letting you project content from your laptop, tablet, or smartphone without a single cord in sight. This is possible through built-in wireless adapters, or sometimes with an external wireless HDMI transmitter. Some projectors even allow direct streaming (think Netflix or YouTube) by connecting straight to your Wi-Fi network. And if the projector itself doesn’t come with streaming capabilities, connecting devices like a Roku, Amazon Fire Stick, or Chromecast can do the trick. Some units have voice control features, making it possible to start presentations or control media with simple voice commands, adding a futuristic flair to your meetings.
Lens Zoom for Flexible Setups
Another handy advantage is lens zoom. If you’re frequently on the move and often presenting in different rooms, each with its own unique quirks, a projector with optical lens zoom can be a lifesaver. By adjusting the zoom, you can change the image size without having to physically shuffle the projector back and forth. Larger zoom ratios mean greater flexibility, allowing a much bigger image when you need it. However, ultra-compact portable models often forgo zoom to stay light and tiny, so it’s worth keeping in mind for your particular needs.
Lens Shift for Perfect Alignment
If you’ve ever struggled to align a projected image just right on the screen (and let’s be honest, who hasn’t?), you’ll appreciate lens shift. This feature lets you physically shift the lens—increasing or decreasing height, or moving the image sideways—without distorting the picture or lowering the resolution. Particularly helpful in permanent setups like auditoriums or fixed installations, lens shift gives you more leeway with mounting, room shape, and screen placement.
These advanced features are designed to offer added flexibility and ensure your presentations look polished, even when the physical environment throws you a curveball.
Another important feature to consider, especially in newer projector models, is HDR, or High Dynamic Range. HDR in projectors allows for a much broader range between the brightest whites and the deepest blacks, creating a more lifelike, vibrant image. If you’ve ever noticed how some movie scenes look washed out or “flat,” that’s often due to a lack of dynamic contrast and color depth. With HDR, brighter highlights and richer shadows become possible, letting you see details in both sunlit and shaded areas of your projected image, whether you’re displaying colorful graphs, dramatic photos, or cinematic video.
HDR-compatible projectors bring subtleties to light that standard projectors might miss, making visuals appear more realistic and engaging. This enhanced dynamic range can be especially valuable for presentations with complex imagery or for venues aiming to impress with cinematic quality.
Now that we’ve covered the projector itself, it’s only fair to give a nod to the unsung hero of any presentation: the screen. Selecting the right type of screen can play just as significant a role as the projector in ensuring crisp, vibrant visuals, whether you’re presenting to the board or projecting your next big idea in a classroom.
Here’s a quick rundown of the main screen types and why you might choose each:
Choosing the right screen really comes down to your room setup and how often you plan to use it. Whether it’s convenience, a permanent installation, or portability you’re after, there’s a solution to fit your environment.
Understanding Keystone Correction
Another handy feature to be aware of is keystone correction. Let’s face it: sometimes, mounting or placing your projector in the perfectly ideal location just isn’t possible. Maybe there’s a table in the way, or you’re working with a quirky room layout. In those cases, keystone correction is what saves your presentation from looking like a scene from a funhouse mirror.
Here’s how it works: when a projector is tilted up, down, or off to the side rather than being squarely aligned with the screen, the image can become distorted, taking on a trapezoidal shape instead of that nice crisp rectangle. Keystone correction solves this by allowing you to tweak or “correct” the image, either digitally via menu settings or, on some models, manually by physically adjusting the lens. The end result? Your slide deck, photos, or video come through straight and true, without any distracting slants or wonky angles.
Keystone correction isn’t a substitute for careful placement, but it’s an invaluable tool in the AV world, letting your content shine even when the setup isn’t quite textbook-perfect.
Choosing Between White and Gray Screens
After considering projector specs like brightness, resolution, and contrast, the next component you shouldn’t overlook is the actual projection surface. Many people ask: should I go with a white screen, or is a gray screen better suited for my needs? Let’s break it down.
White Screens:
White screens are the classic go-to for most professional environments. They’re designed to maximize brightness, which works especially well if your meeting room, classroom, or boardroom is well-lit or flooded with ambient light. If you’re often projecting spreadsheets, presentations with lots of white backgrounds, or detailed graphs, a white screen will help your images remain crisp and clear to everyone in the room.
Gray Screens:
Gray screens, sometimes called high-contrast screens, are a bit of a different beast. Their subtle tint helps them enhance perceived contrast, meaning that blacks appear deeper and colors more vivid, even if some ambient light sneaks in from windows or overhead fixtures. This makes gray screens a popular pick for spaces that double as media or video rooms, or anywhere you’re projecting video content that benefits from punchier colors and better shadow detail. They’re also helpful if your walls are light-colored or if you can’t control all the light in your space.
Which One Is Right for You?
Lastly, keep in mind that every screen type is rated by its “gain,” or its ability to reflect light. A higher gain screen can kick up the brightness, but the best choice always comes down to your room environment and how you plan to use your projector.
 Should I Use a Projector Screen or Just a Wall?
While it’s tempting to project onto a handy white wall, you’ll get the best viewing experience with a proper projection screen. Here’s why: a dedicated screen is engineered to reflect light more evenly and efficiently than most wall surfaces, which boosts image brightness and sharpness. Walls, even when freshly painted, tend to absorb some of the projector’s light, dulling the image and often introducing texture or imperfections that can hamper clarity.
A projector screen also lets you take advantage of something called “screen gain.” This refers to how effectively the screen bounces light back toward your audience. Higher gain screens focus more light in the direction of viewers, making images pop with extra brightness—especially important in environments with ambient room light.
In summary:
So, if image quality matters—and let’s face it, if you’re investing in a good projector, it should—a purpose-built screen is a worthwhile upgrade.
While choosing the right projector is essential, selecting the correct accessories and services will ensure you get the most from your investment and make your day-to-day use smoother and more enjoyable. Here are several key items and considerations to complete your setup:
With the right accessories and support, your projector system can deliver crisp, impactful presentations for years to come.
Once you’ve narrowed down the specs you need for brightness, resolution, and contrast ratio, the next question is where to actually pick up your projector and screen. Both online and brick-and-mortar shopping have their advantages, and your choice might depend on a few key considerations:
Ultimately, the right choice will depend on how much hands-on research you’d like to do, your schedule, and whether you value convenience over the comfort of expert guidance. Whichever approach you choose, make sure you check return policies and support resources just in case you run into any surprises once everything is up and running.
CSAV Systems helps businesses, schools, houses of worship, and organizations design, install, and support audio visual solutions tailored to your needs. Whether you’re upgrading a conference room, planning a classroom installation, or building out a large presentation space, our team can help you find the right fit. Call us today at 732-577-0077 or click here for a Free Systems Analysis.
